Bread Sweets

Caramel Apple Skillet Pull Apart Bread

This Caramel Apple Skillet Pull Apart Bread just screams fall! It is an ooey-gooey dessert that pairs perfectly with ice cream. It totally does the trick on it’s own, but if you choose to serve it up a la mode, it adds another great dimension.

Apple is good by itself. It really is. Anything with apple and caramel though…

Caramel Apple Skillet Pull Apart Bread from butterloveandcowboys.com

Caramel Apple Skillet Pull Apart starts out with a simple, no-rise dough. That’s right- no rise- all you have to do is mix it up and let it rest for ten minutes! While the dough is resting, caramelize the apple-y, cinnamon-y filling and bake. While it bakes, you’ll throw together the homemade caramel sauce. If you’re short on time or don’t want to take the time to make the caramel, you could always use a store bought variety, however I highly recommend this homemade version. It’s easy as pie, it just requires a little boiling, and is so good!

Caramel Apple Skillet Pull Apart Bread from butterloveandcowboys.com


Caramel Apple Skillet Pull Apart Bread from butterloveandcowboys.com

Once the bread is out of the oven, you top it with the caramel sauce and a simple glaze. You know, top or drench. I prefer to drench. And then your Caramel Apple Skillet Pull Apart Bread is completed! If you do serve it with ice cream, I recommend another ladle-full of caramel atop said ice cream :). 

Caramel Apple Skillet Pull Apart Bread from butterloveandcowboys.com


Caramel Apple Skillet Pull Apart Bread from butterloveandcowboys.com

Caramel Apple Skillet Pull Apart Bread from butterloveandcowboys.com


Caramel Apple Skillet Pull Apart Bread is the perfect dessert for fall and it is so calling your name :).

Recipe Inspired by Picky Palate.

Caramel Apple Skillet Pull Apart Bread
An ooey-gooey pull apart, oozing with caramel, dripping with glaze, and perfect for fall.
Write a review
Print
For the Apple Filling
  1. 2 medium size apples, cut into small chunks
  2. 1/3 cup butter
  3. 1/2 cup brown sugar
  4. 2 teaspoons cinnamon
  5. 1/2 teaspoon vanilla
For the Dough
  1. 2 1/2-3 cups flour
  2. 1 tablespoon instant yeast
  3. 1/4 teaspoon salt
  4. 1 tablespoon vegetable oil
  5. 1/3 cup sugar
  6. 1 cup warm water
*For the Caramel Sauce
  1. 1 cup brown sugar
  2. 1/4 cup salted butter
  3. 1/2 cup cream
  4. 1 tsp vanilla
For the Glaze
  1. 1 1/2 cups powdered sugar
  2. 1/3 cup cream
  3. 1/2 teaspoon vanilla
Instructions
  1. 1. Preheat oven at 400 F. Begin by making the apple filling. After cutting the apples into small chunks, melt butter in a 12-inch, cast iron skillet. Add the apples, brown sugar, cinnamon, and vanilla. Cook over medium heat 7-10 minutes, until apples soften and cook most the way through. Remove from heat.
  2. 2. To make the dough, combine 1 cup flour and the yeast in a bowl, set aside. In the bowl of a stand mixer, place, salt, vegetable oil, sugar, water, and the yeast mixed with one cup flour. Mix until it begins to come together. Gradually add the remaining flour. After you have added the initial 1 cup mixed with the yeast, you will likely need the remaining 1 1/2 cups. However, if the dough is still too sticky, add the remaining 1/2 cup of flour, only adding a couple tablespoons at a time. Do NOT use more than 3 cups of flour. I usually need a little more than the initial 2 1/2 cups, but rarely need an entire 1/2 cup after that. Just add a little at a time to avoid adding too much flour. Shape dough into a ball, place in a large bowl, and let rest in a warm place for ten minutes.
  3. 3. While the dough is resting, place all the caramel sauce ingredients into a medium sized saucepan. You can turn the heat on low to begin melting the ingredients, but don't let it cook or boil yet. You will do that while the dough is in the oven. (Stirring the caramel sauce as it boils is a full-time job.) After the dough has rested, remove it from the bowl and cut into bite-size chunks, about 35-40 pieces. Place in the skillet and toss gently into the apple filling ingredients with a rubber spatula. Bake about 15 minutes or until the top begins to brown and the dough is cooked through.
  4. 4. Turn up the heat on the caramel sauce ingredients and bring to a boil. Boil rapidly 7-10 minutes, or until desired consistency is reached. You will have to stir the entire time. Remove from heat. I like to set in the freezer on a hot pad for about 10 minutes to cool down a little bit.
  5. 5. To make the glaze, whisk together the powdered sugar, cream, and vanilla. Add more or less cream until desired consistency is reached. Drizzle about 1/2 cup of the caramel sauce and most of the glaze on top of the pull apart bread. We like to add extra caramel sauce and glaze to our individual servings, because if you add too much caramel and glaze in the skillet, the pull apart bread in the skillet will become soggy. Serve with ice cream if desired.
Notes
  1. *This is the caramel sauce recipe halved for the pull apart bread, but I usually just make a full batch because we love this sauce for ice cream and many other desserts. So if you want leftover caramel sauce, go ahead and make a full batch by doubling the measurements listed.
Butter, Love, and Cowboys https://www.butterloveandcowboys.com/
Bread Sweets

Chocolate Pumpkin Bread

Happy first day of fall! I can’t think of a better way to celebrate than with this Chocolate Pumpkin Bread. For ages, I have had pumpkin bread combined with chocolate on my mind, and I finally got it made. It is my first official pumpkin recipe of the season, and for that I am excited.

I love fall. The one consolation to me when summer comes to an end is that it means fall is here. I am definitely a four-seasons-kind-of-gal, but I really look forward to summer all year long and it is such a bummer to me when it is over.

Fall definitely helps ease the pain.

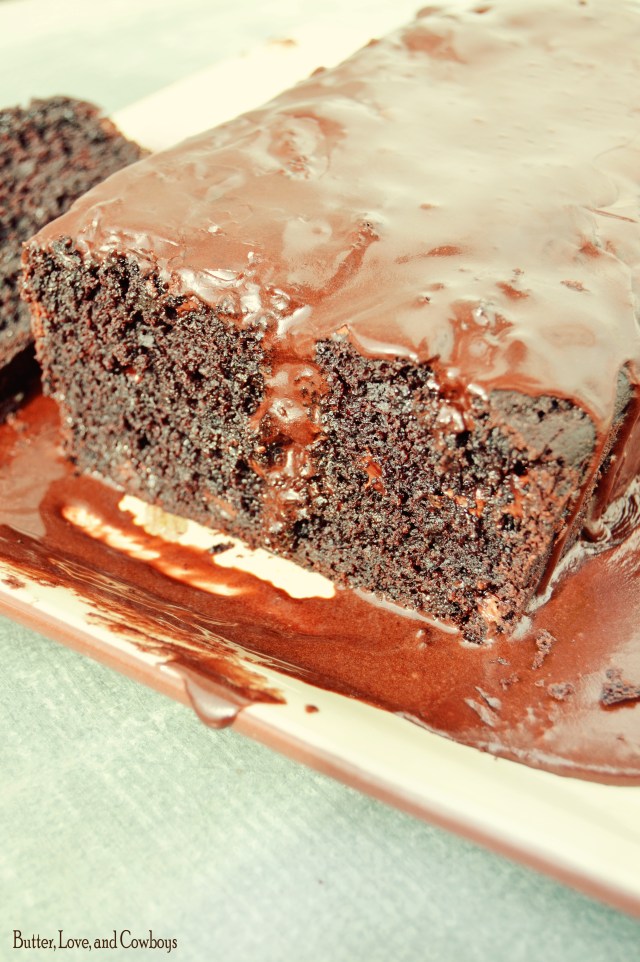
Chocolate Pumpkin Bread from butterloveandcowboys.com

You know what else helped ease the pain? This Chocolate Pumpkin Bread. Pumpkin bread really is fantastic enough by itself, but this version takes it to infinity and beyond. The actual bread has all the ingredients you would normally see in pumpkin bread, but with a whole bunch of cocoa added to seal the deal. Plus chocolate chips- I don’t believe in any pumpkin bread without chocolate chips.

The bread ends with a chocolate glaze. When I made the glaze, I was doubling the recipe for two loaves and really thought I was making plenty. I was wrong. Therefore, I will fill the recipe card with instructions for a batch of glaze that will go a little farther. I would never want to con you into thinking that my recipe gives you ample glaze, and have you disappointed that you needed to hurry and make up another batch.

When it comes to glaze, I like a decent covering, like shown in the pictures, but I also like to have enough to set aside that we can put on top of our individual pieces after they are cut.

Chocolate Pumpkin Bread from butterloveandcowboys.com

Chocolate Pumpkin Bread from butterloveandcowboys.com

Chocolate Pumpkin Bread from butterloveandcowboys.com

Chocolate Pumpkin Bread from butterloveandcowboys.com

Chocolate Pumpkin Bread from butterloveandcowboys.com

Chocolate Pumpkin Bread from butterloveandcowboys.com

Another thing about quick breads is that they are, well, quick! It only takes a few minutes to throw them together for the oven. Plus Chocolate Pumpkin Bread will make your house smell dreamy. Happy Fall!

Recipe adapted from Lindsay Funston

Chocolate Pumpkin Bread
A fantastic quick bread, fully loaded with chocolate, chocolate chips, and a chocolate glaze- perfect for fall!
Write a review
Print
Bread
  1. 1/2 cup vegetable oil
  2. 2 eggs
  3. 1/4 cup sour cream
  4. 3/4 cup sugar
  5. 2 teaspoons vanilla
  6. 1 cup pumpkin puree
  7. 1 cup flour
  8. 1/2 cup cocoa powder
  9. 1 tablespoon pumpkin pie spice
  10. 1 teaspoon baking soda
  11. 1/2 teaspoon baking powder
  12. 1 cup milk chocolate chips
Chocolate Glaze
  1. 2 tablespoons butter, melted
  2. 2 1/2 cups powdered sugar
  3. 1/4 cup cocoa powder
  4. 1/3 cup cream
  5. 1/2 teaspoon vanilla
Instructions
  1. Preheat oven @ 350 F. In a large mixing bowl, combine vegetable oil, eggs, sour cream, sugar, vanilla, and pumpkin. In another bowl, combine, flour, cocoa powder, pumpkin pie spice, baking soda, and baking powder. Pour wet ingredients in with the dry ingredients and mix until combined. Fold in the chocolate chips. Place in a greased 9x5 loaf pan and bake for 40-45 minutes or until toothpick inserted in the center comes out clean. Let cool ten minutes then flip onto a serving plate.
  2. To make the chocolate glaze, whisk together melted butter, powdered sugar, cocoa powder, cream, and vanilla. I find it hard to give an exact amount of liquid for a glaze, because it is dependent on who thick you want it. I prefer a thicker glaze, so add as much or as little cream as you like, until the desired consistency is reached. Pour over the pumpkin loaf and enjoy! Store leftovers in an airtight container.
Butter, Love, and Cowboys https://www.butterloveandcowboys.com/
Brownies and Bars

Caramel Chip Bars

Oh boy is this recipe a doozy! Caramel Chip Bars are about as tasty as it gets. This is another recipe from my sister Jessie. So many of both My Cowboy’s and I’s favorite recipes come from her. She is just a whiz in the kitchen. This is a brownie-like bar that is one of my main picks when it comes to making a dessert to take and share.

Caramel Chip Bars are as easy as they are delicious and come together in a cinch. The brownie part of this dessert comes from a simple cake mix, oil, eggs, AND plenty of chocolate chips! The caramel layer is semi-homemade, but tastes so great. Honestly it’s a filling I use in a lot of different recipes now. If I am too short on time to do a homemade sauce, I will even serve it as caramel sauce for ice cream or dip for fruit.

Caramel Chip Bars from butterloveandcowboys.com


Caramel Chip Bars from butterloveandcowboys.com

Caramel Chip Bars from butterloveandcowboys.com

Caramel Chip Bars from butterloveandcowboys.com

Caramel Chip Bars from butterloveandcowboys.com


This is a side shot, and it’s really not the prettiest, but I really wanted you to get a better glimpse of all that caramel!

Caramel Chip Bars from butterloveandcowboys.com

Go on and give ’em a whirl 🙂

Caramel Chip Bars
An ooey-gooey brownie bar bursting with chocolate chips and oozing with caramel
Write a review
Print
Ingredients
  1. 1 box chocolate cake mix
  2. 1/2 cup oil
  3. 2 eggs
  4. 2 cups milk chocolate chips
  5. 1 cup white chocolate chips
  6. 1/3 cup toffee bits (optional)
  7. 1 11oz bag caramels
  8. 1 14 oz can sweetened condensed milk
  9. 1/2 cup butter
Instructions
  1. 1. Preheat oven at 320 F. Mix the cake mix, oil, and eggs until combined. Add milk chocolate chips, white chocolate chips, and optional toffee bits. Combine by hand. Press half of the dough into a greased 9x13 pan. Bake for twelve minutes. Cool for ten minutes before adding caramel.
  2. 2. While the first cake layer is baking and cooling, unwrap the caramels and place in a medium size saucepan with the sweetened condensed milk and butter. Melt over medium-low heat until well-combined, stirring occasionally. Once the mixture is mostly melted, I like to whisk it long enough to ensure there are no chunks.
  3. 3. Pour caramel over the first cake layer. Top with remaining cake batter by sprinkling it over the caramel in teaspoon-fulls Bake an additional 20-25 minutes. These bars are great warm or cold, but I usually let them cool an hour or two.
Notes
  1. If you're looking for a less chocolate-y option, use a yellow cake mix. I really, really, REALLY love them as is though 🙂
Butter, Love, and Cowboys https://www.butterloveandcowboys.com/
No-Bake

Hot Fudge Sauce

I love ice cream and I love Hot Fudge Sauce. Hot Fudge and I are basically two peas in a pod. Especially when it is dripping down a bowl full of three or four big ol’ scoops of vanilla ice cream. I’m not a big fan of vanilla ice cream plain. I love it on top of a brownie or cobbler, but I’d much rather have something with a chocolate or even a fruity base if I’m eating it plain. Does it surprise you that my number one pick is any flavor that has both chocolate and peanut butter? However, I adore vanilla ice cream when it is dripping with Hot Fudge. It’s even better if there is a brownie on the bottom!

This has been my go-to Hot Fudge Sauce for years. My mom stumbled upon this recipe when I was a young teen and I’ve been making it ever since. It is super simple and can be ready to serve nice and quick-like. 

Hot Fudge Sauce from butterloveandcowboys.com

This recipe is the perfect consistency. I like a fairly thick sauce for ice cream. I would rather it be too thick than too thin. This version is thick enough it stick s a bit to the ice cream but thin enough it doesn’t harden once it’s placed on top of it.

There are a few Hot Fudge recipes in my arsenal. My Cowboy and I love them all. We rotate through each of them, but I always have a special place in my belly for this one. I would say I’ve always been a Hot Fudge addict, but this past year or so, I have not been restricting my intake to just ice cream. I’ve been eating it on brownies, cheesecake, fruit and anything else that I think it can possibly go with. And for whatever treat I don’t think Hot Fudge pairs well with, I use this caramel sauce.

Whoever came up with the idea that a little Hot Fudge Sauce goes a long way didn’t love it nearly as much as I do.

I have drenching problems.

Hot Fudge Sauce from butterloveandcowboys.com

Hot Fudge Sauce from butterloveandcowboys.com

Hot Fudge Sauce from butterloveandcowboys.com

For this sauce, I use 2/3 milk chocolate and 1/3 dark chocolate. I’m not a fan of dark chocolate alone, I much prefer the sweetness of milk chocolate. I love rich flavors though. So in order to get the sweetness of milk chocolate with the richness of dark chocolate, I pair the two together, with a higher ratio of milk chocolate. If you are a dark chocolate lover, go ahead and use as much dark as you like!

Now go on and drench your ice cream with this delicious sauce!

Hot Fudge Sauce
A quick and easy Hot Fudge Sauce that pairs perfectly with ice cream, but can be used for any treat you'd like to drench with chocolate!
Write a review
Print
Ingredients
  1. 1 14 oz can sweetened, condensed milk
  2. 2/3 cup milk chocolate chips
  3. 1/3 cup dark chocolate chips
  4. 4 tablespoons butter
  5. 1 teaspoon vanilla
  6. 2 tablespoons heavy cream (optional)
Instructions
  1. Place sweetened condensed milk, milk chocolate chips, dark chocolate chips, butter, and vanilla in a small saucepan over medium-low heat. Stir occasionally until melted. Don't let it scorch! Finish melting in any chocolate clumps by whisking. Add cream, if desired, for consistency. Add more if you want to thin out the sauce. Serve over ice cream or brownies. Refrigerate leftovers.
Notes
  1. Use any ratio of dark or milk chocolate chips you like! I prefer the flavor of milk chocolate with a little richness from the dark chocolate, so I add the dark chocolate chips. Sometimes I do 3/4 cup milk chocolate to 1/4 cup dark chocolate. Use what you prefer.
Butter, Love, and Cowboys https://www.butterloveandcowboys.com/
Ramblings

Montana Gold

We had our second Montana trip of the summer a few weeks ago. We spent the week in Glacier National Park and had the time of our lives with my family.  On our way back from Glacier to my parent’s house, My Cowboy and I just had to stop and pull to the side of the road for this sunflower field. As if the field of flowers with the Rocky Mountain backdrop wasn’t enough, it just happened to be sunset hour.

Montana Gold from butterloveandcowboys.com

Montana’s official nickname is “The Treasure State”. This nickname originated from the 1800’s, when it was discovered her mountains were rich in silver and gold. As I think of Montana, I definitely think of gold, but not the metal variety. The Montana Gold I’m referring to holds little monetary value, but is far more precious. So if you ever visit Montana, promise me you will take time to sit still and breathe in everything around you. You will discover she does in fact hold a whole lot of gold. 

Montana Gold from butterloveandcowboys.com

Montana Gold is in the sunrises and sunsets that illuminate the entire Big Sky. It’s in the thousands upon thousands of acres, acres containing fields, brimming with ripe grain. It can be found in the quaking aspen leaves as summer begins that brilliant shift to fall. Haystacks piled high with a full winter’s supply also hold a beauty just like that of gold.

Most recently I found Montana Gold in this stunning sunflower field. The evening was so perfectly calm. We had just enjoyed an entire week of Montana’s rugged beauty in the unparalleled Rocky Mountains. Plus I was with My Cowboy. It was the ultimate ending to our trip. 

Montana Gold from butterloveandcowboys.com

Montana Gold from butterloveandcowboys.com

Montana Gold from butterloveandcowboys.com

Montana Gold from butterloveandcowboys.com

Montana Gold from butterloveandcowboys.com

Montana Gold from butterloveandcowboys.com

Montana Gold from butterloveandcowboys.com

Montana Gold from butterloveandcowboys.com

Montana Gold from butterloveandcowboys.com

Montana Gold from butterloveandcowboys.com

Montana Gold from butterloveandcowboys.com

Montana Gold from butterloveandcowboys.com

Montana Gold from butterloveandcowboys.com

Montana Gold isn’t only to be found in the landscapes. It’s in her people too. A big piece of my heart will always belong to Montana, a heart that was shaped by so much more than the wildflowers and the sunsets. Montana filled my life with people whose examples of kindness, community, faith in God, friendship, and love outshine any valuable mineral or even a great, big, beautiful field of sunflowers.

Call it what you will, but that’s why I consider it the Treasure State.

Cakes and Cupcakes

S’mores Cobbler

I love S’mores. Naturally, S’mores are meant for summer and summer is meant for S’mores. And you know what? I haven’t even had a single S’more this entire season! I credit that mostly to the heat. It’s been so hot the last thing we want to do is start a fire after the sun goes down. We even took a week-long camping trip in Glacier Park, but fire season has been so bad all fires were banned during our visit. So after our trip, to lessen the pain, I came home and made this S’mores Cobbler. 

Now all summer I have had this intense fruity cobbler craving. I have made several berry cobblers and loved every bite. Since I’ve been craving cobbler and I’ve been craving S’mores, why not put the two together? S’mores Cobbler is a tasty combination of the two treats.

S'mores Cobbler from butterloveandcowboys.com

S'mores Cobbler from butterloveandcowboys.com

S'mores Cobbler from butterloveandcowboys.com

Anything chocolate-y, fudge-y, oo-ey, goo-ey, and topped with ice cream has my name written all over it. S’mores Cobbler is just that! Not to mention we topped it off with a little homemade caramel sauce. A little extra hot fudge would be grand too!

S'mores Cobbler from butterloveandcowboys.com

S'mores Cobbler from butterloveandcowboys.com

Now, I really love S’mores, but what I love even more are homemade treats that incorporate the elements of a S’more. I just couldn’t let the summer slip by without sharing at least one such dessert.  S’mores Cobbler is a great way to end the season!

Recipe adapted from Spicy Southern Kitchen.

S'mores Cobbler
S'mores Cobbler is a chocolate-y, oo-ey, goo-ey dessert, perfectly topped off with ice cream.
Write a review
Print
Ingredients
  1. 2 instant chocolate pudding packets (3.4 oz each)
  2. 2 1/2 cups cold milk
  3. 8-9 full size graham cracker sheets
  4. 1 1/2 cups milk chocolate chips, divided
  5. 1 box devil's food cake mix
  6. 1/2 cup butter
  7. 4-5 cups mini marshmallows
Instructions
  1. 1. Preheat oven at 350 degrees F. Whisk together pudding packets and milk. Place pudding in a greased 9x13 pan.
  2. 2. Spread graham cracker sheets evenly across the top of the pudding. You will have to break some of the sheets to evenly cover everything.
  3. 3. Sprinkle 1 cup of the chocolate chips across the graham crackers. Next, pour the dry cake mix evenly over the chocolate.
  4. 4. Cut the butter into slices and spread evenly on top of the cake mix. Bake 23 minutes.
  5. 5. Remove from oven and gently stir in any dry cake mix. Sprinkle the top with mini marshmallows and then the remaining 1/2 cup chocolate chips. Place under the broiler for 1-2 minutes or until marshmallows are toasted. Turn the oven light on or crack the oven and watch the marshmallows closely! I have over-toasted marshmallows way too many times under the broiler!
  6. 6. Serve warm and top with ice cream. You can also serve with caramel sauce or hot fudge, if desired. Refrigerate leftovers.
Butter, Love, and Cowboys https://www.butterloveandcowboys.com/


No-Bake

Raspberry Golden Oreo Dessert

Raspberry Golden Oreo Dessert is a combination of some wonderful things. Remember Heavenly Oreo Dessert? It is a spin-off of that delightful recipe. It starts out with a Golden Oreo crust, followed by the traditional sweetened cream cheese layer. On top of that we place a raspberry filling. For that filling, I used one in a half batches of my Raspberry Sauce recipe. Lastly, Cool Whip and extra Golden Oreo crumbs topped it off nicely. 

I have been wanting to do some fruity experimenting with the original Heavenly Oreo Dessert recipe for a while and knew I wanted to do a raspberry version. Raspberry Golden Oreo Dessert was born and was definitely a success! My sisters and their families were staying with us when we had it around. My 12-year-old nephew raved about it. He insisted that I give his mom the recipe and requested I make it again while they were at our house. Honestly, our summer has been so busy I never did either but now it will be easily accessible for all. 

Raspberry Golden Oreo Dessert from butterloveandcowboys.com

Said nephew, the one who loved Raspberry Golden Oreo Dessert is such a crack-up. I started laughing at him when he was about eighteen months old and haven’t stopped since. One evening, in Montana, he, another nine year old nephew of mine, and myself had each other laughing so hard our sides hurt and I was in tears. I accidentally kept getting those boys in trouble for being too loud. But they are just so darn funny.

Golly we have had fun this summer.

With my sisters visiting and a couple extended trips to Montana, we have had such a busy July and August, thus the lack of posts this past two months. I wrote a bit about my first Montana trip already and we have since added another to the list.

Raspberry Golden Oreo Dessert from butterloveandcowboys.com

Raspberry Golden Oreo Dessert from butterloveandcowboys.com

Raspberry Golden Oreo Dessert from butterloveandcowboys.com

Raspberry Golden Oreo Dessert from butterloveandcowboys.com

Raspberry Golden Oreo Dessert from butterloveandcowboys.com

Raspberry Golden Oreo Dessert from butterloveandcowboys.com

Raspberry Golden Oreo Dessert from butterloveandcowboys.com

Any who, Raspberry Golden Oreo Dessert is calling your name. Summer is nearing it’s end for the year, but this is a summer dessert you won’t want to miss out on!

Raspberry Golden Oreo Dessert
Raspberry Golden Oreo Dessert is a fruity and creamy no-bake dessert that will be a crowd favorite.
Write a review
Print
Ingredients
  1. 1 package Golden Oreo's
  2. 1/2 cup butter, melted
  3. 8 oz cream cheese, soft
  4. 1 cup powdered sugar
  5. 2 (8 oz each) containers Cool Whip
  6. 3 tablespoons cornstarch, mixed with 3 tablespoons cold water
  7. 3 cups fresh OR frozen raspberries
  8. 3/4 cup water
  9. 1 1/4 cup sugar
  10. 3 tablespoons lemon juice
  11. 1 teaspoon vanilla
Instructions
  1. 1. Crush the Golden Oreo's into small chunks with a food processor OR a Ziploc bag and rolling pin. Reserve 1/2 cup of the crumbs for topping. Combine Golden Oreo's and melted butter in a 9x13 inch pan. Press into pan.
  2. 2. Beat the softened cream cheese until smooth. Mix in powdered sugar. Fold in 1 (8 oz) container of Cool Whip with a spatula. Spread over Oreo crust. Place in the fridge for now.
  3. 3. For the raspberry filling, whisk the cornstarch and cold water together. In a large saucepan place the raspberries, water, sugar, and lemon juice. Stir frequently as you bring the mixture to a low boil over medium heat. Gradually stir in the cornstarch/water mixture.
  4. 4. Simmer, covered for about seven minutes or until desired thickness is reached. Stir occasionally. Add vanilla and remove from the heat. Place pan of raspberry filling in the freezer for twenty minutes to cool quickly.
  5. 5. Once filling has cooled a while, remove the 9x13 pan from the fridge, and pour filling over the cream cheese layer. Top with the second container of Cool Whip and garnish with reserved 1/2 cup of Oreo crumbs.Refrigerate 1-2 hours or until the filling has completely cooled. Keep refrigerated.
Notes
  1. *Though I adore the homemade filling, for a quicker dessert you could always use canned raspberry pie filling instead!
Butter, Love, and Cowboys https://www.butterloveandcowboys.com/
Ramblings

A Montana Sunset

Two weeks ago My Cowboy and me traveled up to my home-state of Montana. Three of my siblings and their families were there as well, so it was a good time to visit my parents and other members of my family. We planned to only stay for the weekend, but we have been so busy this month that I completely forgot Clay would be gone the following week for a work trip. I hate being home alone. I usually travel to be with my sister that lives close-ish when he has work trips. Said sister was living it up in Montana as well though, so that wasn’t an option.

Naturally, being the thinker I am, realized I would either have a week at home alone, or I could stay in Montana for the week and party with my family while Clay was on his trip. I love to party, so I chose to stay in Montana all week. It was so much fun! We had good eats, good company, and did many things that make up a great time.

Prior to this month, (July is excluded from these feelings because it has been so fun, crazy, chaotic, fun, busy, and fun, thus the lack of blog posts) I had really been feeling the daily grind and craved a break from it. I think most of us have those times. Sometimes life just gets daunting and we need a change of pace, a change of scenery. This trip was just the thing to give me what I needed. It helped rejuvenate me and brought me peace I hadn’t felt in a long time.

One evening, I took a little walk down the road. The road I took was filled with the perfect view of one of my most favorite scenes- a Montana sunset. 

While I strolled, the Montana sunset completely encompassed my world and reminded me of things I so often felt as I walked that road when I was younger. It brought me peace. It brought a remembrance of my days before adulthood that were filled with work, family, friends, the beauty that surrounded me daily, and fresh-cut hay. (If you don’t appreciate the smell of fresh-cut hay, you need to.) As a teenager, I loved all those things and knew I would miss home once I ventured to college, but I still don’t think we fully appreciate home until we leave it. 

I’m grateful for the opportunities to go back to my childhood home and enjoy a Montana sunset. Most of my siblings don’t live as close to Montana as we do, so we work hard to travel there often and take advantage of the proximity. Last week, several of my siblings and I had the opportunity to enjoy our childhood home together. That made my Montana sunset even better. 


A Montana Sunset from butterloveandcowboys.com

I am convinced that barley is the prettiest crop.

A Montana Sunset from butterloveandcowboys.com

And Montana is the prettiest place…

A Montana Sunset from butterloveandcowboys.com

A Montana Sunset from butterloveandcowboys.com

A Montana Sunset from butterloveandcowboys.com

A Montana Sunset from butterloveandcowboys.com

A Montana Sunset from butterloveandcowboys.com

It is so refreshing going back home and spending time the way I spent it when I was a kid. That always seems to bring fresh perspective into my life. Going back to our roots is a fantastic way to remember who we have been, who we are, and where we want to be. For me, it offers a real chance for self-reflection.

Taking in a Montana sunset also instills in me a deep gratitude for my parents. They gave us a good life. We had space to play, work, and grow. The country life may not be for everyone, but it was and is SO for me. It brings with it a simplicity and pace of life I just couldn’t imagine being found anywhere else. 

A Montana sunset is so much more than what meets the eye. I highly recommend one.

Happy Friday!


Cakes and Cupcakes

Blueberry Poke Cake

Blueberry Poke Cake has such delicious layers that I couldn’t even tell you which one is my favorite. Before we go into this rad cake though, let me explain what happened with the photos. After a few months of food blogging, I have learned many things I didn’t know when I first started. One of the things I have learned is to take food photos before anybody digs in, especially if we are having company over to help us eat. At the very least, I will set aside a few servings.

Blueberry Poke Cake from butterloveandcowboys.com

We had company over for dessert the night we ate Blueberry Poke Cake. I didn’t get photos taken before our visitors came, because it was a super sunshiny day, and I decided to wait for better lighting. After all, we had an entire 9×13 pan, and only a few people to help us eat it. I told myself there would be plenty of leftovers to photograph.

Apparently I was wrong because there were only about three pieces of Blueberry Poke Cake left, and they weren’t the prettiest. While I can’t say the piece of cake I photographed was too good-lookin’, I promise it’s taste totally made up for it’s looks. Don’t get me wrong, I am absolutely tickled that the cake was almost gone, because that means our visitors enjoyed it, and that is always the goal at my house. It just means I learned a lesson about not procrastinating food photos. Which, by the way, is so easy to do when you just wanna dig in!

Blueberry Poke Cake from butterloveandcowboys.com

Blueberry Poke Cake starts out with a moist cake bottom. I used a cake mix, which is NOT my favorite, but I added a few things to make it extra delicious. Next, I did a homemade blueberry pie filling. Can I just say yum?! Something I love about this Blueberry Poke Cake is that you could do it with any fruit filling you want. I am particularly fond of the blueberry for this cake though, because it reminds me of a tasty cake my school cooks made.

Blueberry Poke Cake from butterloveandcowboys.com

Mmm mmm good!

Blueberry Poke Cake
Blueberry Poke Cake has a moist cake bottom, homemade pie filling, and absolutely fantastic whipped frosting!
Write a review
Print
For the Cake
  1. 1 box yellow OR white cake mix
  2. 1 cup sour cream
  3. 1/3 cup vegetable oil
  4. 1/4 cup milk
  5. 4 large eggs
  6. 2 teaspoons vanilla
  7. 1 3.4 oz package vanilla pudding
Blueberry Filling
  1. 2 1/2 cups frozen blueberries
  2. 1/2 cup water
  3. 1/2 cup sugar
  4. 2 tablespoons lemon juice
  5. 1 teaspoon vanilla
  6. 2 tablespoons cornstarch, mixed with 2 tablespoons cold water
Whipped Cream Frosting
  1. 2 cups heavy whipping cream
  2. 8 oz cream cheese, softened
  3. 2 cups powdered sugar
Instructions
  1. 1. Preheat oven at 350 F. Combine all the cake ingredients and mix for about one minute, on low-speed. Scrape down the sides of the bowl and beat another one to two minutes on low-speed. Pour batter into a greased 9x13 pan and bake 30-35 minutes, or until a toothpick inserted into the center comes out clean.
  2. 2. After 20 minutes, poke holes all over the cake with a wooden spoon. Prepare the pudding according to the directions on the pudding package. Spread over top of cake and let it fill in the holes. Place in the fridge.
  3. 3. In a medium-large saucepan, over medium heat, place blueberries, water, sugar, lemon juice, and vanilla. Bring to a low boil. Whisk together the cornstarch and 2 tablespoons cold water. Add cornstarch to the blueberry mixture. Simmer, covered (or else your stove will be a mess) about 3-5 minutes, or until desired thickness is reached. Let cool. Place in the fridge to quicken this. Spread over cooled cake and replace cake in the fridge.
  4. 4. Whip the cream until stiff peaks form. Set aside. Beat cream cheese until light and fluffy. Add powdered sugar and combine. Fold in the whipped cream and spread on top of blueberry filling. Keep cake refrigerated.
Notes
  1. *Recipe adapted from Beyond Frosting- http://beyondfrosting.com/2015/07/09/blueberry-cheesecake-poke-cake/
  2. *Blueberry filling adapted from My Baking Addiction- http://www.mybakingaddiction.com/homemade-blueberry-sauce-recipe/
  3. *Yellow cake recipe adapted from Food.com- http://www.food.com/recipe/sour-cream-yellow-cake-99866
Butter, Love, and Cowboys https://www.butterloveandcowboys.com/
No-Bake

Creamy Peanut Butter Pie

Peanut Butter Pie is one of the BEST recipes to fill a chocolate and peanut butter fix. It is oh so creamy and oh so peanut butter-y, with a touch of chocolate. When I graduated college, my sister brought this pie to my graduation party. I immediately decided it just had to be the best darn Peanut Butter Pie I ever tasted. To this day, nothing has ever topped it. At least not for me.

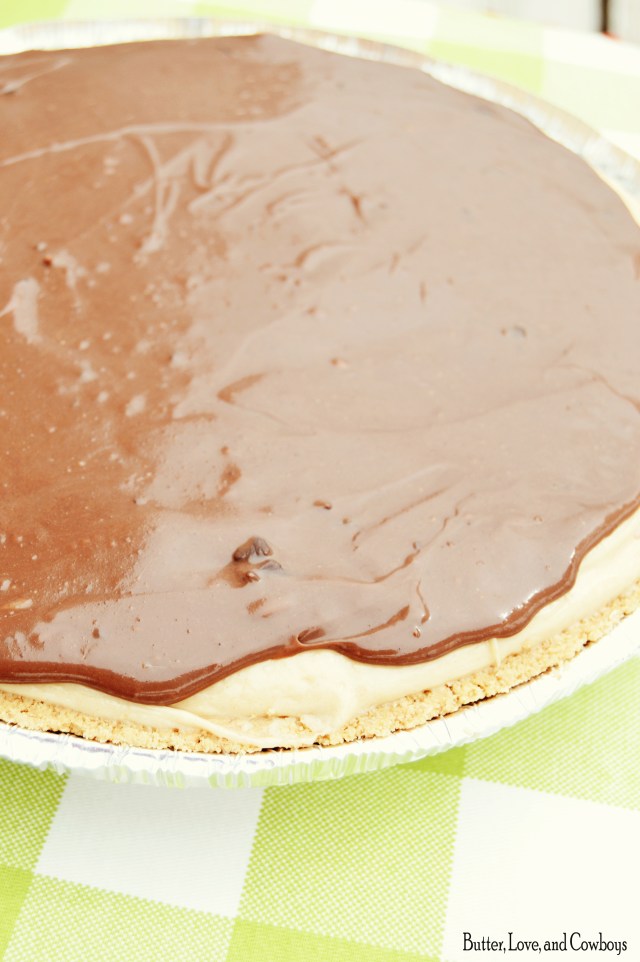
Peanut Butter Pie from butterloveandcowboys.com

This no-bake treat starts out with a graham cracker crust. I am all about Oreo crusts. I love them. Normally, I would suggest an Oreo crust for any dessert that had to do with chocolate or peanut butter. However, I don’t know what it is about this Peanut Butter Pie, but I just love it with that graham cracker crust. This pie is already perfect, so I just couldn’t bring myself to make it any other way.

Next we have an extremely creamy and smooth peanut butter filling. In my opinion, the filling is what makes this Peanut Butter Pie stand out above the rest. To finish, the chocolate ganache topping completes the pie in a way that nothing else could.

Peanut Butter Pie from butterloveandcowboys.com

Peanut Butter Pie from butterloveandcowboys.com

Peanut Butter Pie from butterloveandcowboys.com

Peanut Butter Pie from butterloveandcowboys.com

Peanut Butter Pie from butterloveandcowboys.com

Peanut Butter Pie is a great dessert for any summer gathering!

Peanut Butter Pie
A smooth and creamy peanut butter pie, topped with just the right amount of chocolate.
Write a review
Print
For the crust
  1. *9 whole graham crackers OR 1 bought 10-inch graham cracker crust
  2. 1/3 cup sugar
  3. 1/2 cup butter, melted
For the peanut butter filling
  1. 1 cup cream
  2. 14 oz cream cheese
  3. 2 cups sugar
  4. 1 1/2 cups peanut butter
  5. 2 teaspoons vanilla
  6. 2 tablespoons butter, melted
For the chocolate ganache
  1. 1 cup milk chocolate chips
  2. 1/3 cup cream
For the crust
  1. 1. If making your own graham cracker crust, crush the graham crackers. Mix the graham cracker crumbs and sugar together. Add the melted butter and combine.
  2. 2. Press into a 9-inch pie plate. Use the bottom of a cup to press it in well. Bake at 350 F for 10 minutes. Let cool.
For the peanut butter filling
  1. 1. Whip the cream until stiff peaks form. Set aside.
  2. 2. Beat cream cheese and sugar well. Add peanut butter and vanilla, then mix. Gradually add the melted butter and combine. Fold the whipped cream into the peanut butter mixture. Do not over-mix. Pour peanut butter filling into your graham cracker crust.
For the chocolate ganache
  1. 1. Heat the cream in the microwave until almost boiling. Pour over chocolate chips. Whisk until well combined. You may need to warm it in the microwave to melt completely.
  2. 2. Spread over the pie and chill until set, about 2-3 hours.
Notes
  1. If you use a bought graham cracker crust, don't use the regular 9-inch size, it has to be the 10-inch size or else it will overflow. The 10-inch size is 9 oz and usually says it makes two extra slices or servings.
Butter, Love, and Cowboys https://www.butterloveandcowboys.com/